Build a Starling nestbox
Give Starlings a safe and cosy place to roost and raise their chicks by putting up a nestbox in your garden.

Our Starling populations have plummeted by about two-thirds since the 1970s. The good news is that they readily use new boxes we put up. You can put up a Starling nestbox whenever you like but, as nesting season can start from mid-March, early spring is best. You can buy a nestbox or two (Starlings like having neighbours) or, if you fancy some DIY, here’s how to make a Starling nestbox.
Instructions
Where to put your Starling nestbox
Ideal nestbox spots are under the eaves of your house or on a mature tree. For trees, use stainless steel or galvanised nails or screws to minimise damage. Make sure you have permission before fitting a box on a property, especially if you rent.
The box should be at least 3m (10 feet) from the ground, facing north or east so it doesn’t get too hot or wet. It needs to be out of direct sunlight, and ideally not over a doorway, window or well-used path.
The box should be at least 3m (10 feet) from the ground, facing north or east to avoid it getting too hot or wet. It needs to be out of direct sunlight, and ideally not over a doorway, window or well-used path.
Choosing the right wood for your Starling nestbox
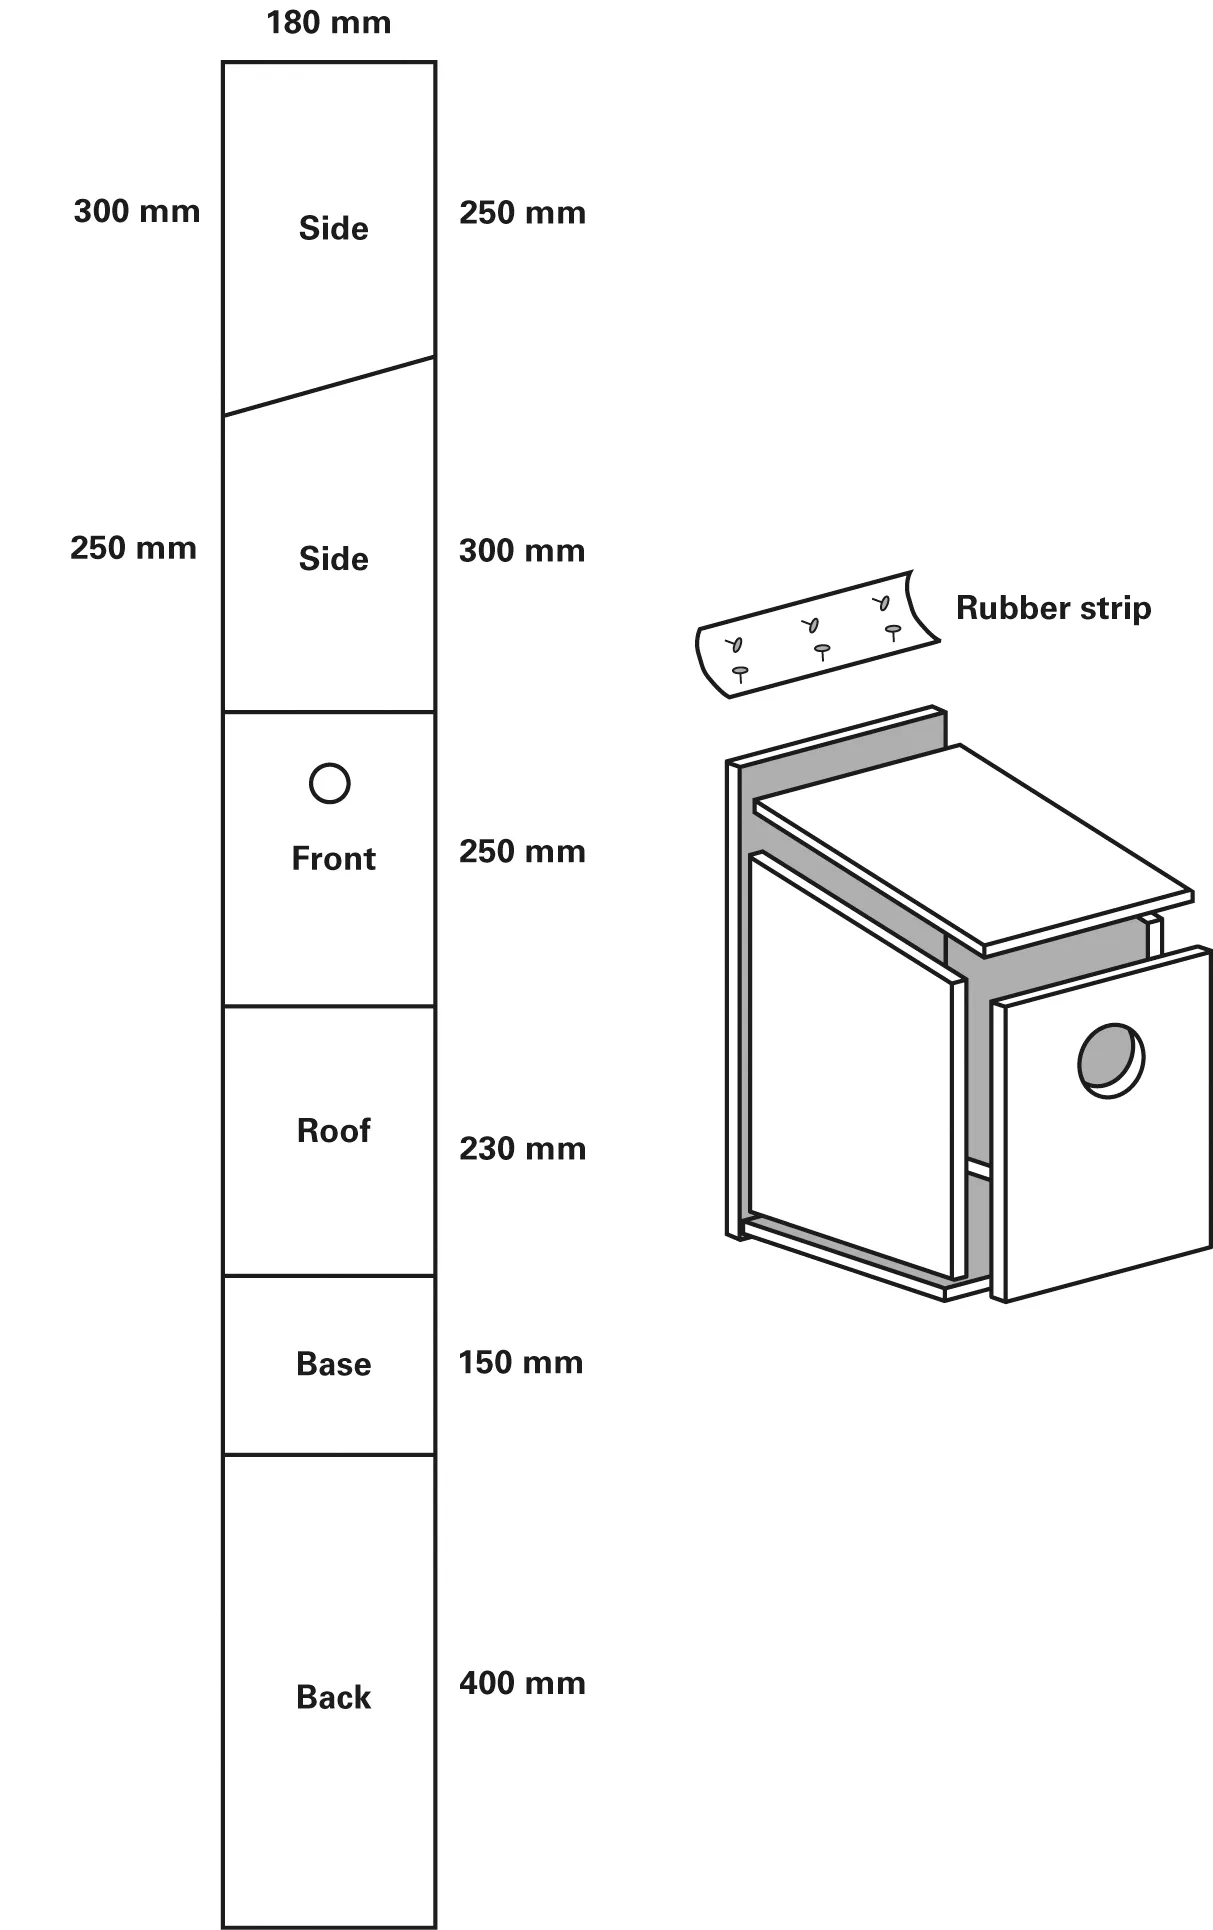
The thickness is important to insulate the box from cold and heat and to stop the box from warping. You can use exterior-quality plywood for a lighter box or, for something more durable, hardwoods like oak and beech. You can also use soft wood like pine, but it will wear more quickly. Buy timber that has not been pressure treated and that is Forest Stewardship Council-approved – check for the FSC logo.